How to Make a Paper Coral Reef (6 Easy Methods)
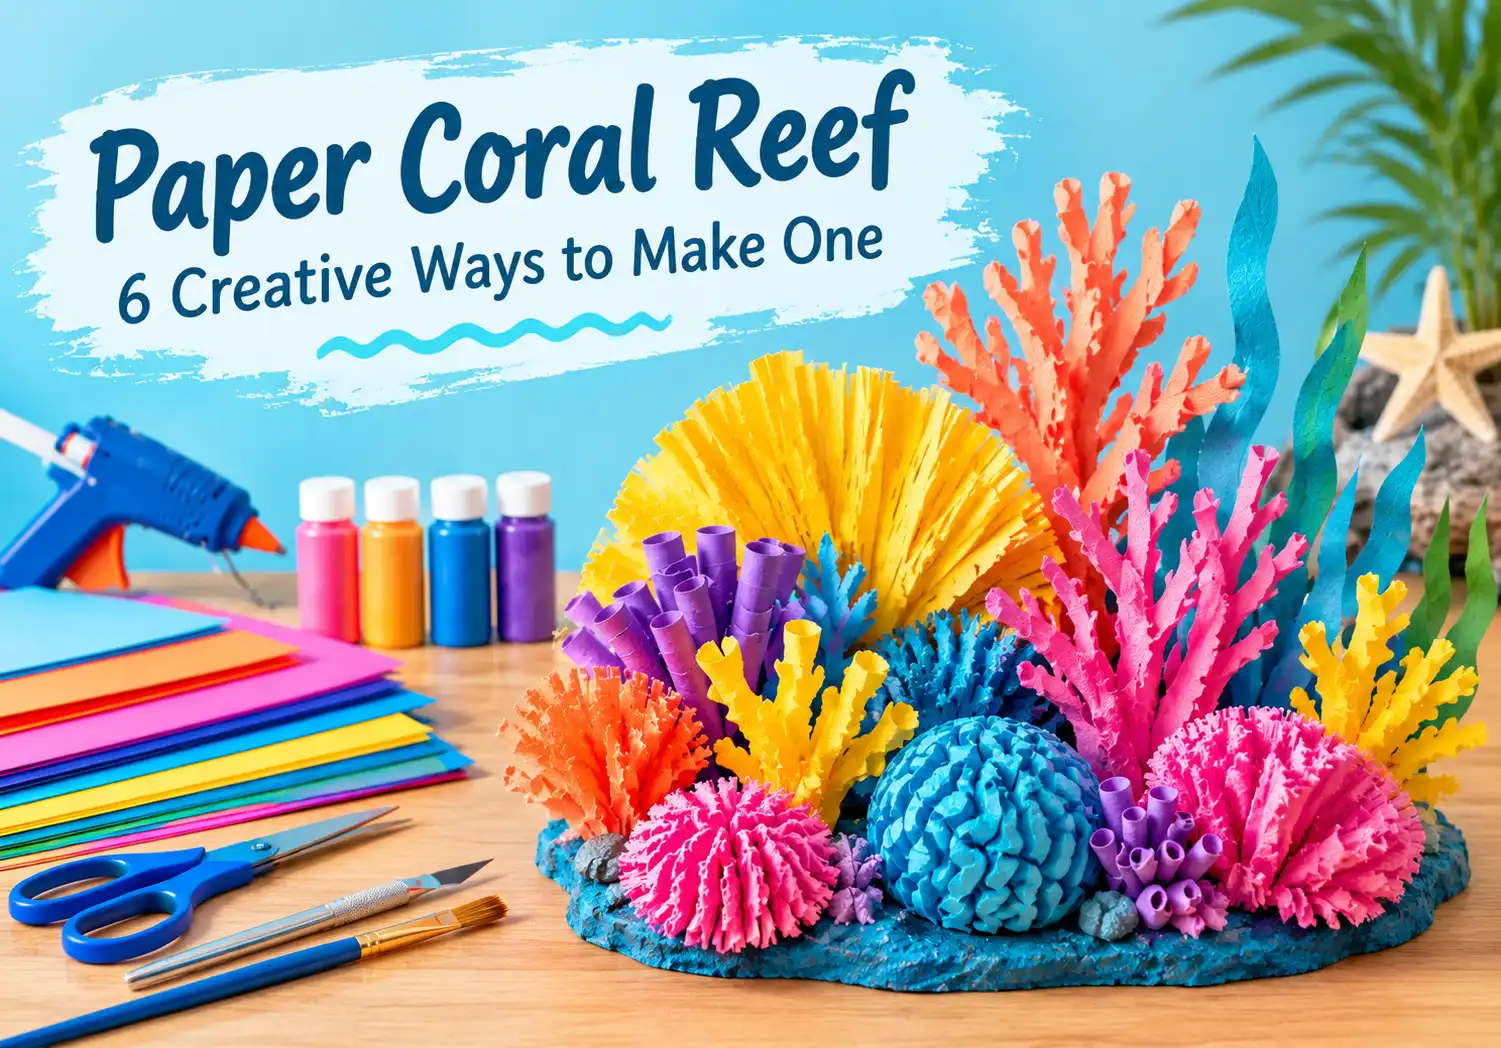
If you’ve ever wanted the color and texture of a real coral reef without the tank, the water, or the maintenance, a paper coral reef is the answer. This paper coral reef project is inexpensive, endlessly customizable, and works just as well as a weekend craft as it does a classroom assignment.
Below are six different ways to make one, from quick and easy to more detailed and decorative, so you can pick the method that matches your time, budget, and materials on hand.
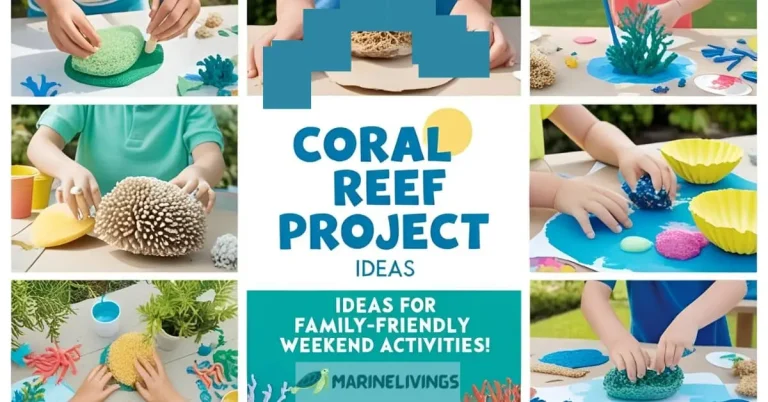
Once you’re done, pair your reef with a few of our coral reef project ideas for more ways to build out the display.
What You’ll Need
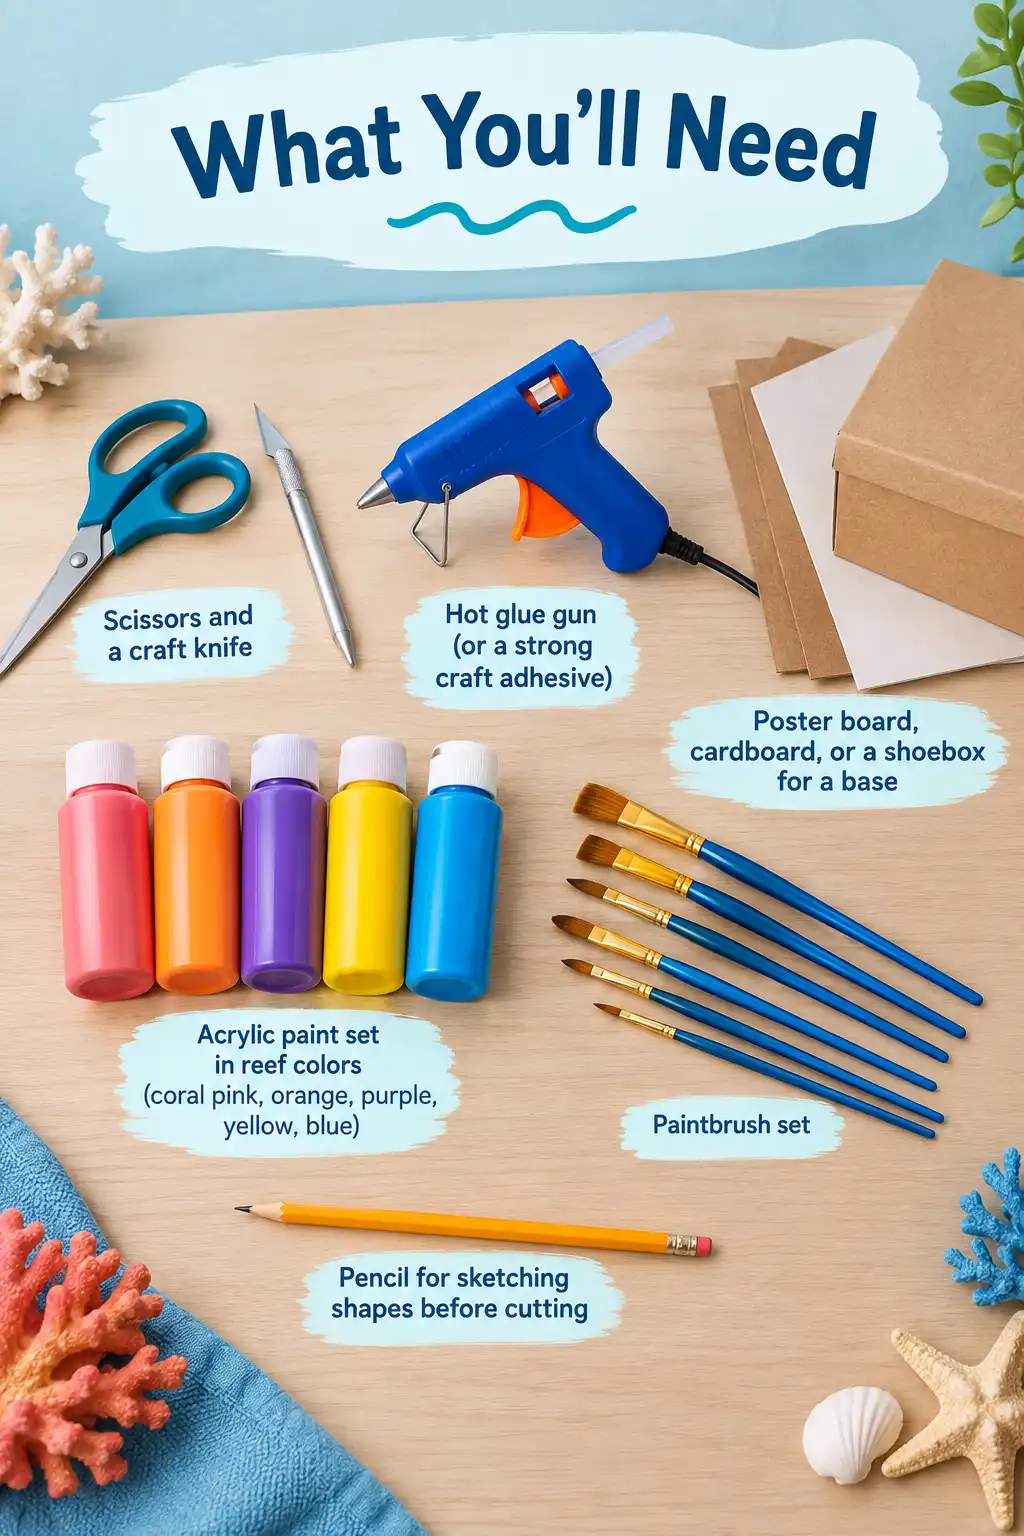
The exact supplies depend on which method you choose below, but a few basics show up in almost every version:
- Scissors and a craft knife
- Hot glue gun or a strong craft adhesive
- Poster board, cardboard, or a shoebox for a base
- Acrylic paint set in reef colors (coral pink, orange, purple, yellow, blue)
- Paintbrush set
- Pencil for sketching shapes before cutting
Each method section below lists any extra materials specific to that technique.
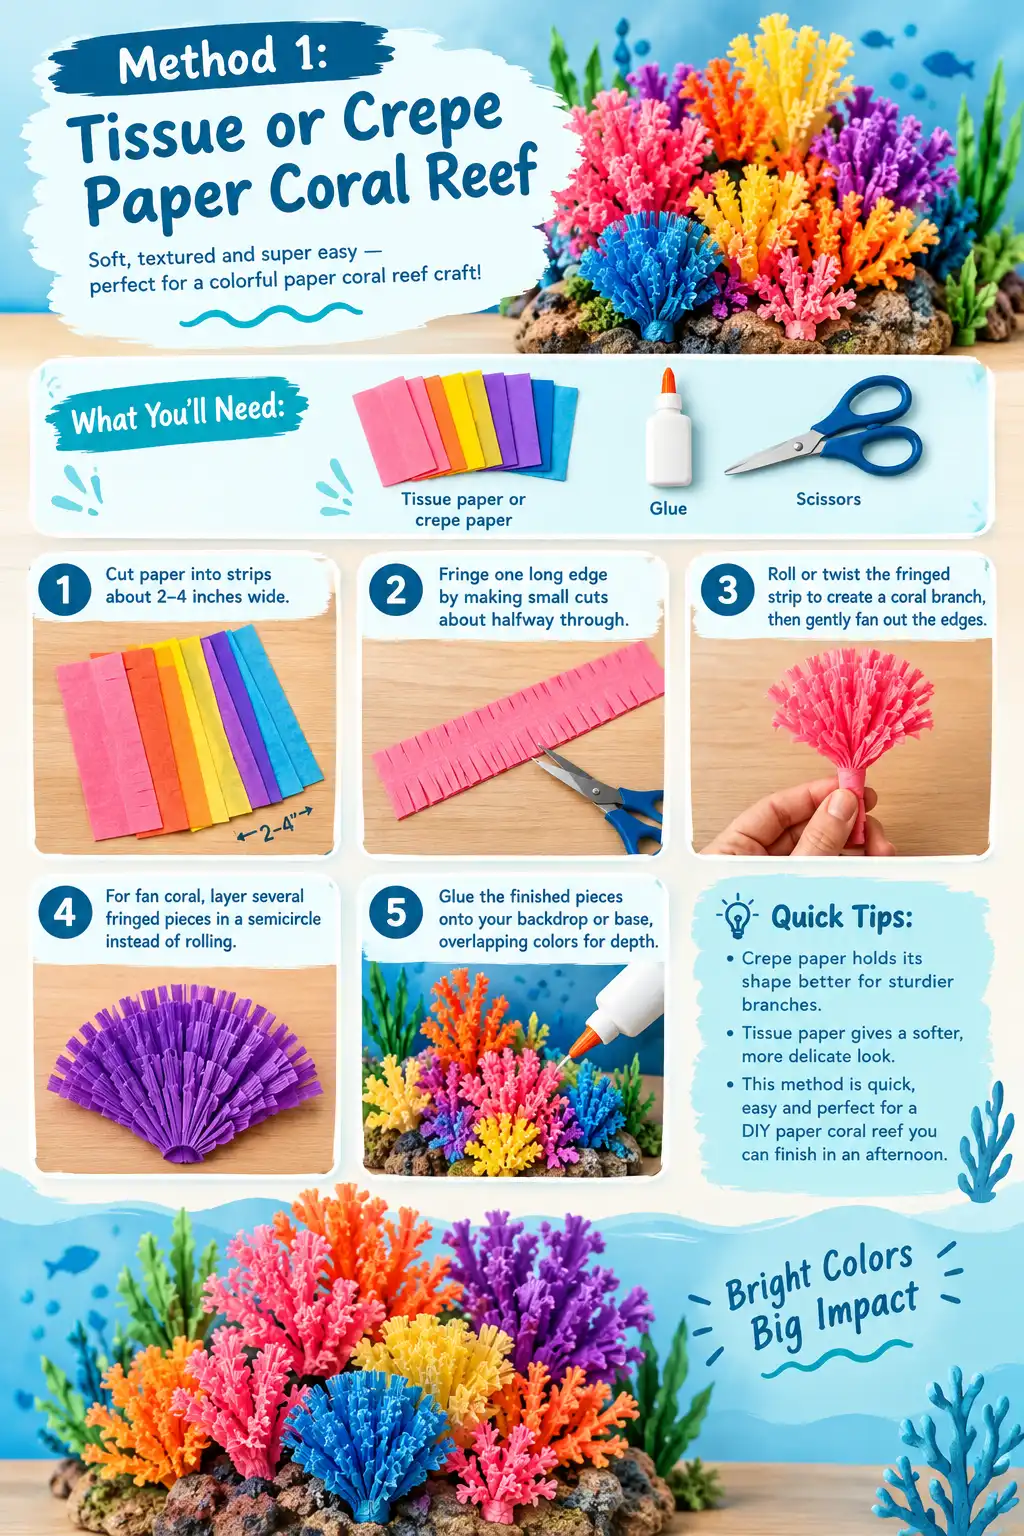
Method 1: Tissue or Crepe Paper Coral Reef
This is the softest, most textured version of a paper coral reef, and it’s the go-to choice if you’re searching for a tissue paper coral reef or crepe paper coral reef craft.
What you’ll need: multicolor tissue paper or crepe paper streamers, glue, scissors.
- Cut tissue or crepe paper into strips roughly 2–4 inches wide.
- Fringe one long edge of each strip by making small cuts about halfway through, close together.
- Starting from the bottom, roll or twist the fringed strip to create a coral branch, then gently fan out the fringed edges.
- For fan coral, layer several fringed pieces in a semicircle instead of rolling them.
- Glue the finished pieces onto your backdrop or base, overlapping colors for depth.
Crepe paper holds its shape a little better than tissue paper if you want sturdier branches, while tissue paper gives a softer, more delicate look. This version is quick to make and works well for both a tissue paper coral reef craft and a tissue paper coral reef DIY you can finish in an afternoon.
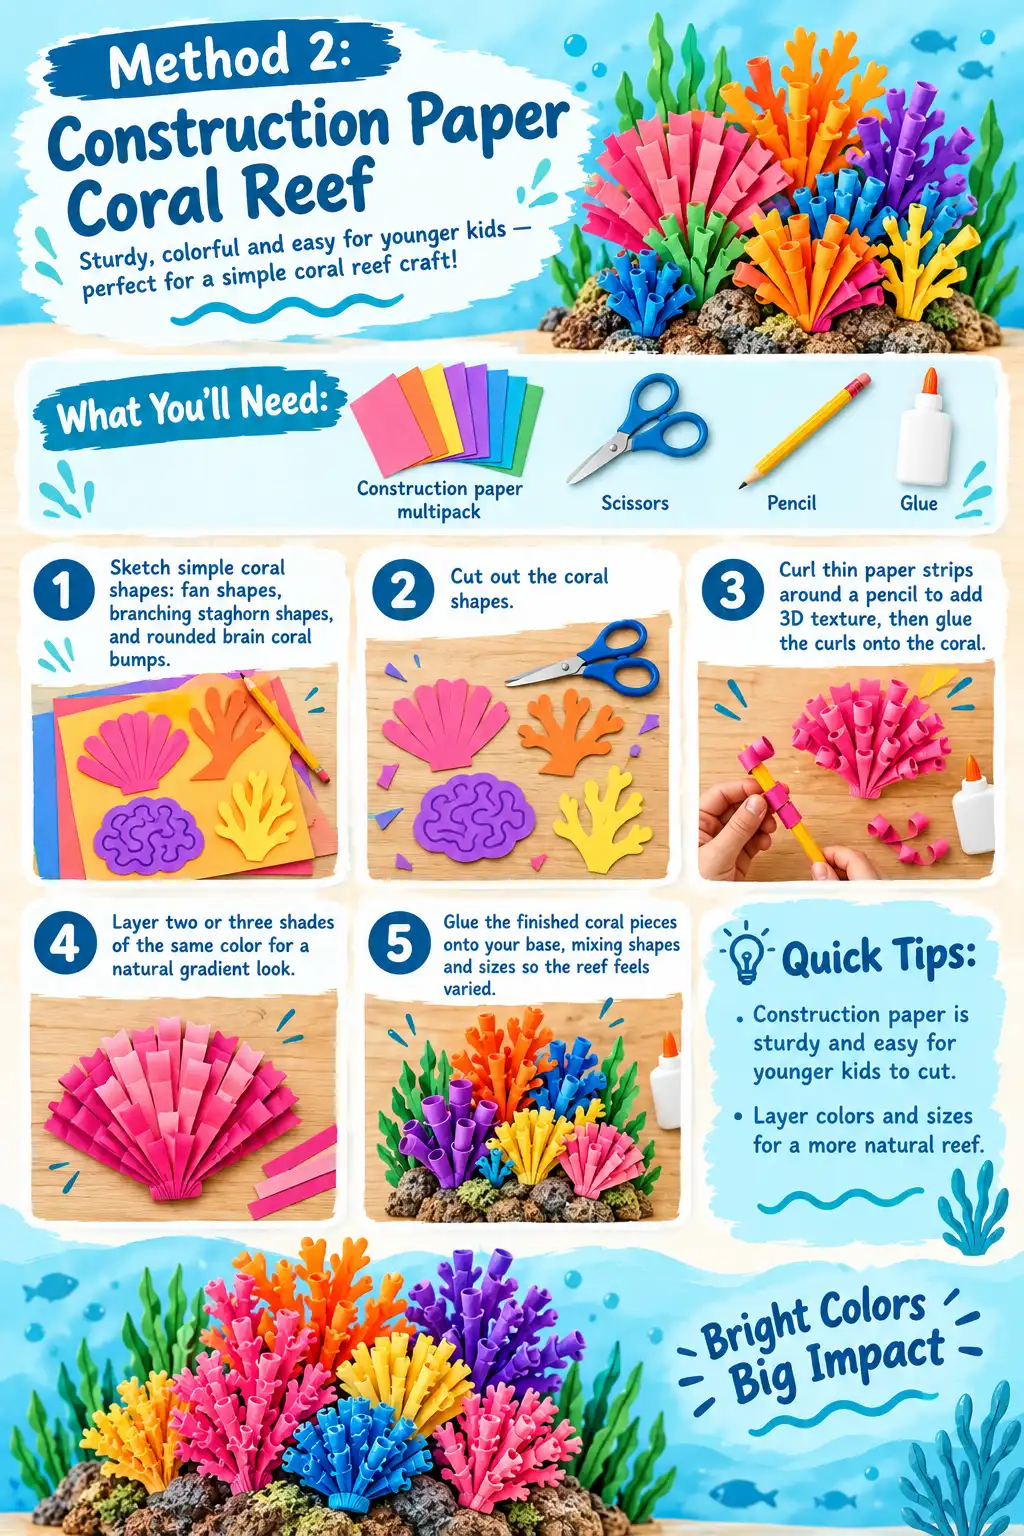
Method 2: Construction Paper Coral Reef
If you want something sturdier and easier for younger kids to cut, a construction paper coral reef is the way to go, and it’s one of the most common answers to “how do I make an easy paper coral reef?”
What you’ll need: construction paper multipack in reef colors, scissors, pencil.
- Sketch simple coral shapes on the back of the paper: fan shapes, branching “staghorn” shapes, and rounded “brain coral” bumps.
- Cut out the shapes.
- Curl thin strips of construction paper around a pencil to add three-dimensional texture, then glue the curls onto the flat coral shapes.
- Layer two or three shades of the same color on top of each other for a more natural, gradient look.
- Glue the finished coral pieces onto your base, mixing shapes and sizes so the reef doesn’t look repetitive.
This method holds up well and is sturdy enough to handle being moved around, which makes it a solid pick for a classroom coral reef construction paper project.
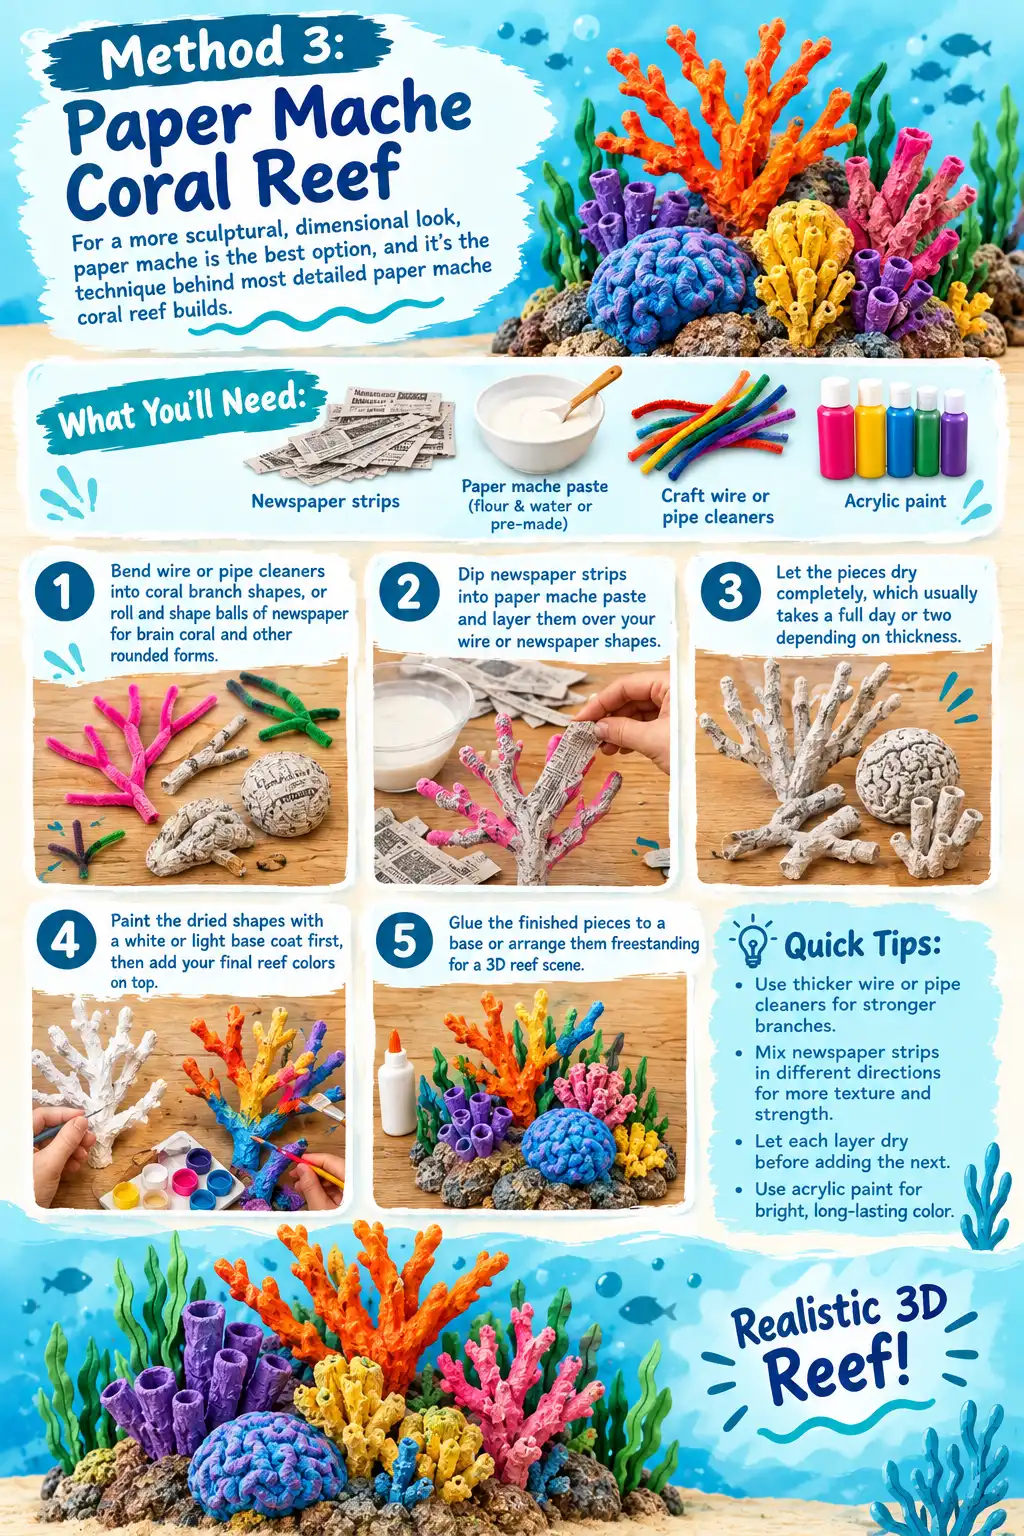
Method 3: Paper Mache Coral Reef
For a more sculptural, dimensional look, paper mache is the best option, and it’s the technique behind most detailed paper mache coral reef builds.
What you’ll need: newspaper strips, paper mache paste (flour and water, or a pre-made paste), craft wire or pipe cleaners, acrylic paint.
- Bend wire or pipe cleaners into coral branch shapes, or roll and shape balls of newspaper for brain coral and other rounded forms.
- Dip newspaper strips into paper mache paste and layer them over your wire or newspaper shapes.
- Let the pieces dry completely, which usually takes a full day or two depending on thickness.
- Paint the dried shapes with a white or light base coat first, then add your final reef colors on top.
- Glue the finished pieces to a base or arrange them freestanding for a 3D reef scene.
Paper mache takes the longest of the six methods, but it produces the most realistic, textured shapes if you want something that reads as a genuine sculpture rather than a flat craft.
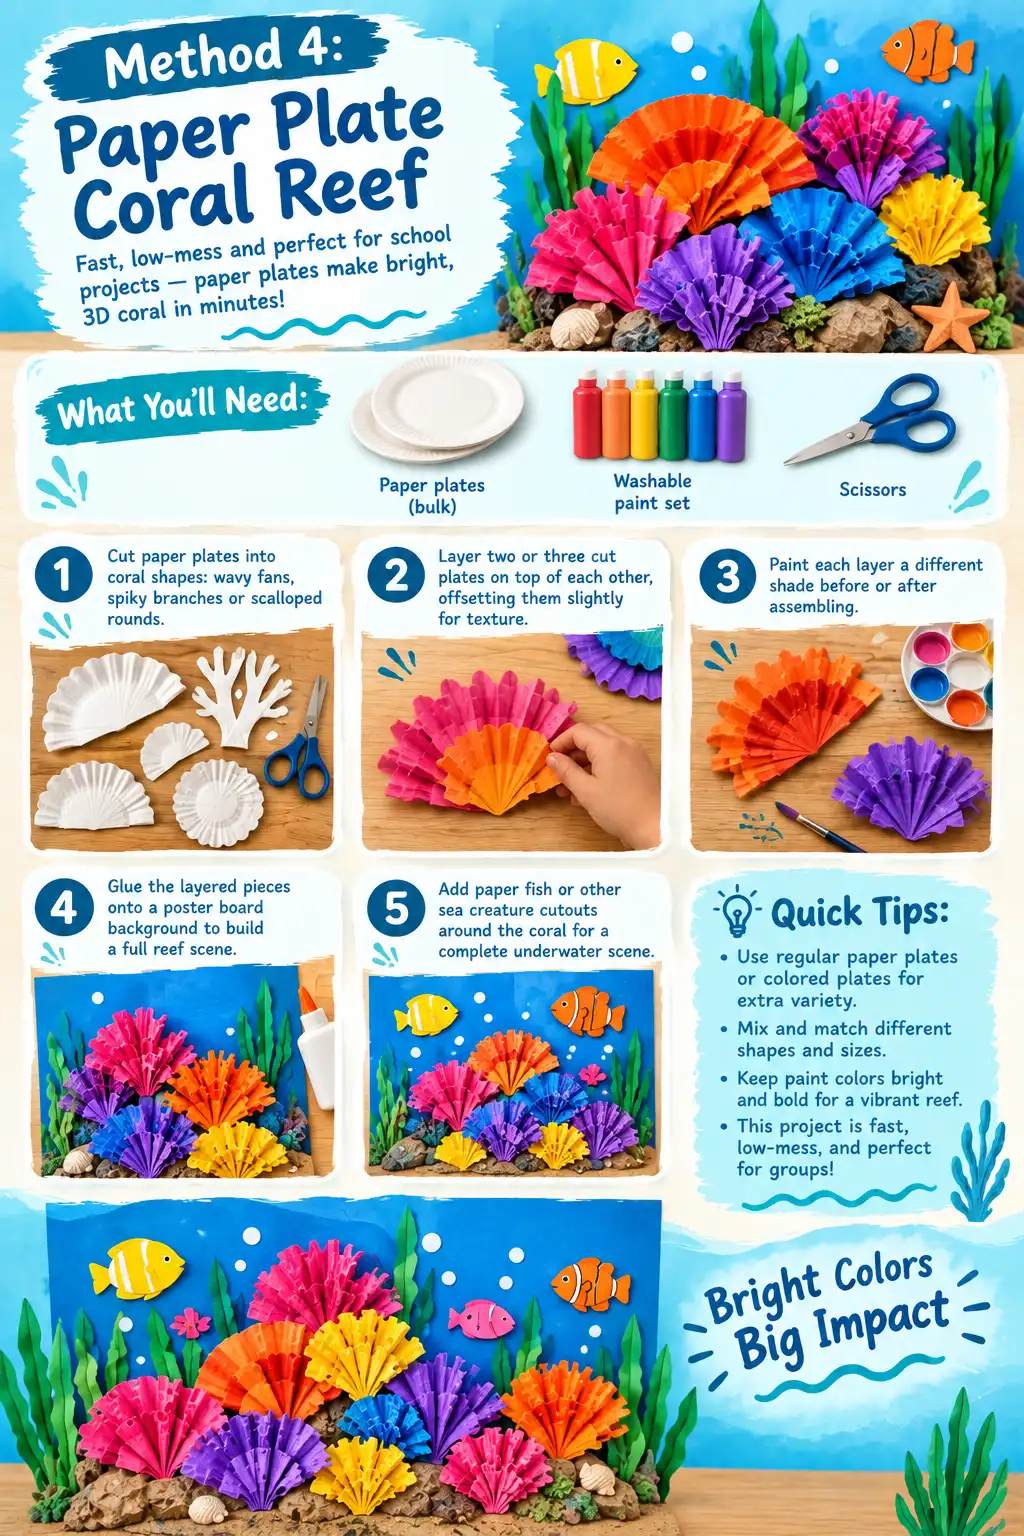
Method 4: Paper Plate Coral Reef (Easy School Project)
If you’re looking specifically for how to make coral reef for school project purposes, paper plates are one of the fastest, least messy options.
What you’ll need: bulk paper plates, washable paint set, scissors.
- Cut paper plates into coral shapes: wavy fan edges, spiky branch shapes, or scalloped rounds.
- Layer two or three cut plates on top of each other, offsetting them slightly for texture.
- Paint each layer a different shade before or after assembling.
- Glue the layered pieces onto a poster board background to build a full reef scene.
- Add paper fish or other sea creature cutouts around the coral for a complete underwater scene.
This method is fast, low-mess, and easy for a group of kids to work on at the same time, which is exactly what makes it a favorite paper plate coral reef classroom project.
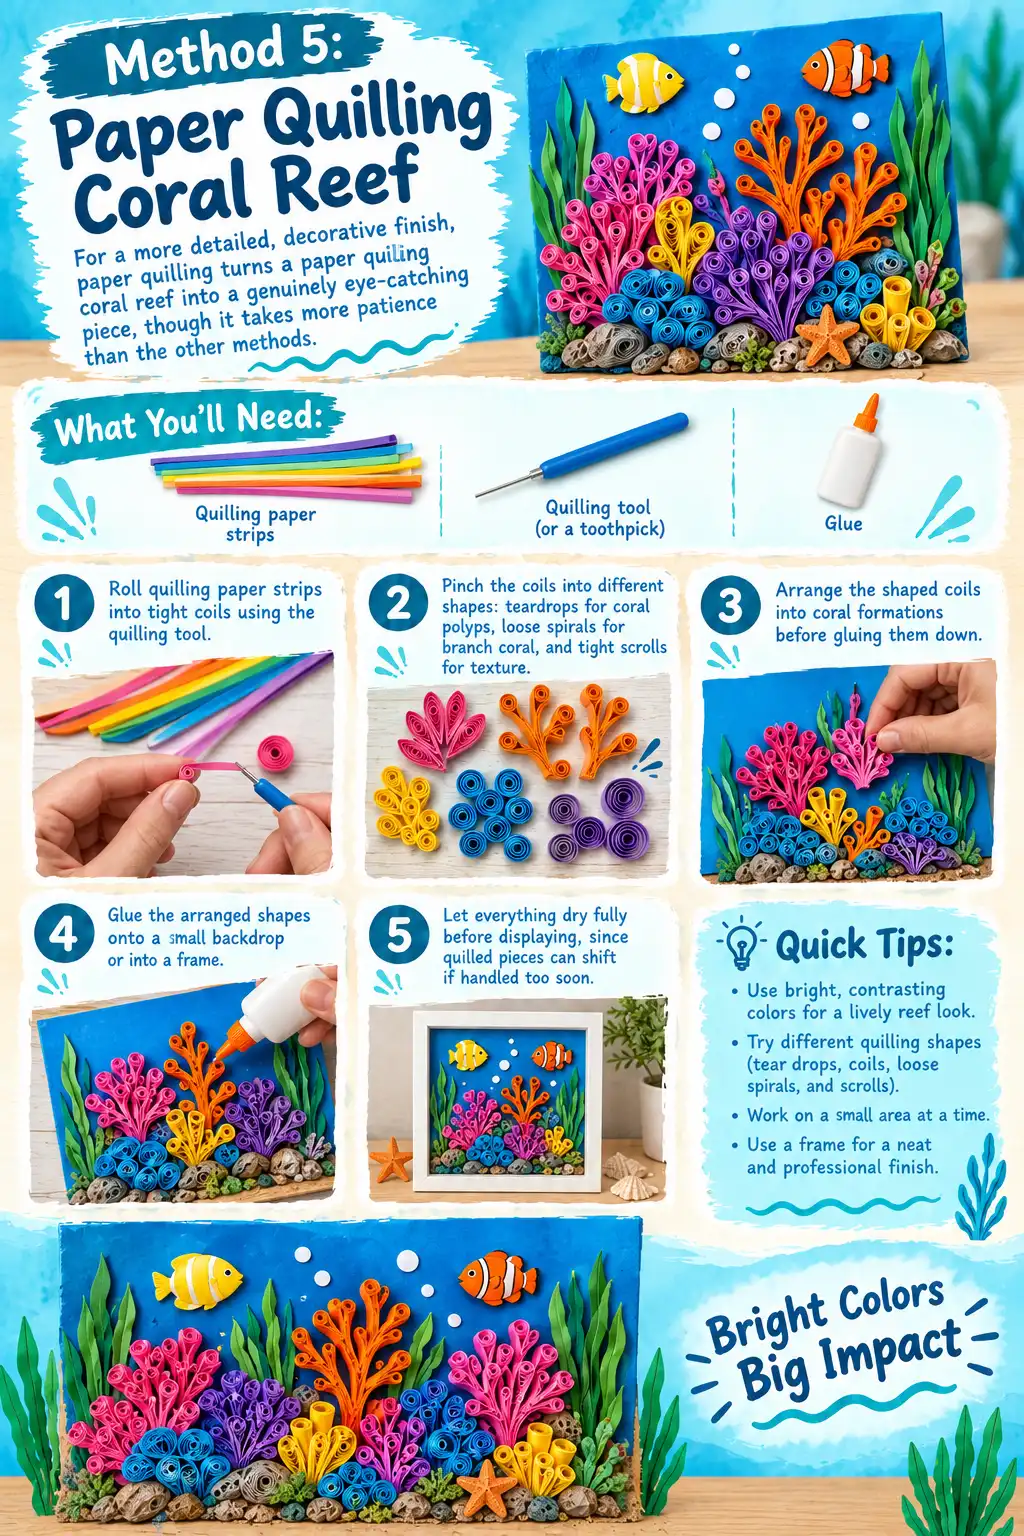
Method 5: Paper Quilling Coral Reef
For a more detailed, decorative finish, paper quilling turns a paper quilling coral reef into a genuinely eye-catching piece, though it takes more patience than the other methods.
What you’ll need: quilling paper strips, a quilling tool (or a toothpick), glue.
- Roll quilling paper strips into tight coils using the quilling tool.
- Pinch the coils into different shapes: teardrops for coral polyps, loose spirals for branch coral, and tight scrolls for texture.
- Arrange the shaped coils into coral formations before gluing them down.
- Glue the arranged shapes onto a small backdrop or into a frame.
- Let everything dry fully before displaying, since quilled pieces can shift if handled too soon.
This method works best for older kids, teens, or adults who want a more intricate, gallery-worthy result rather than a quick craft.
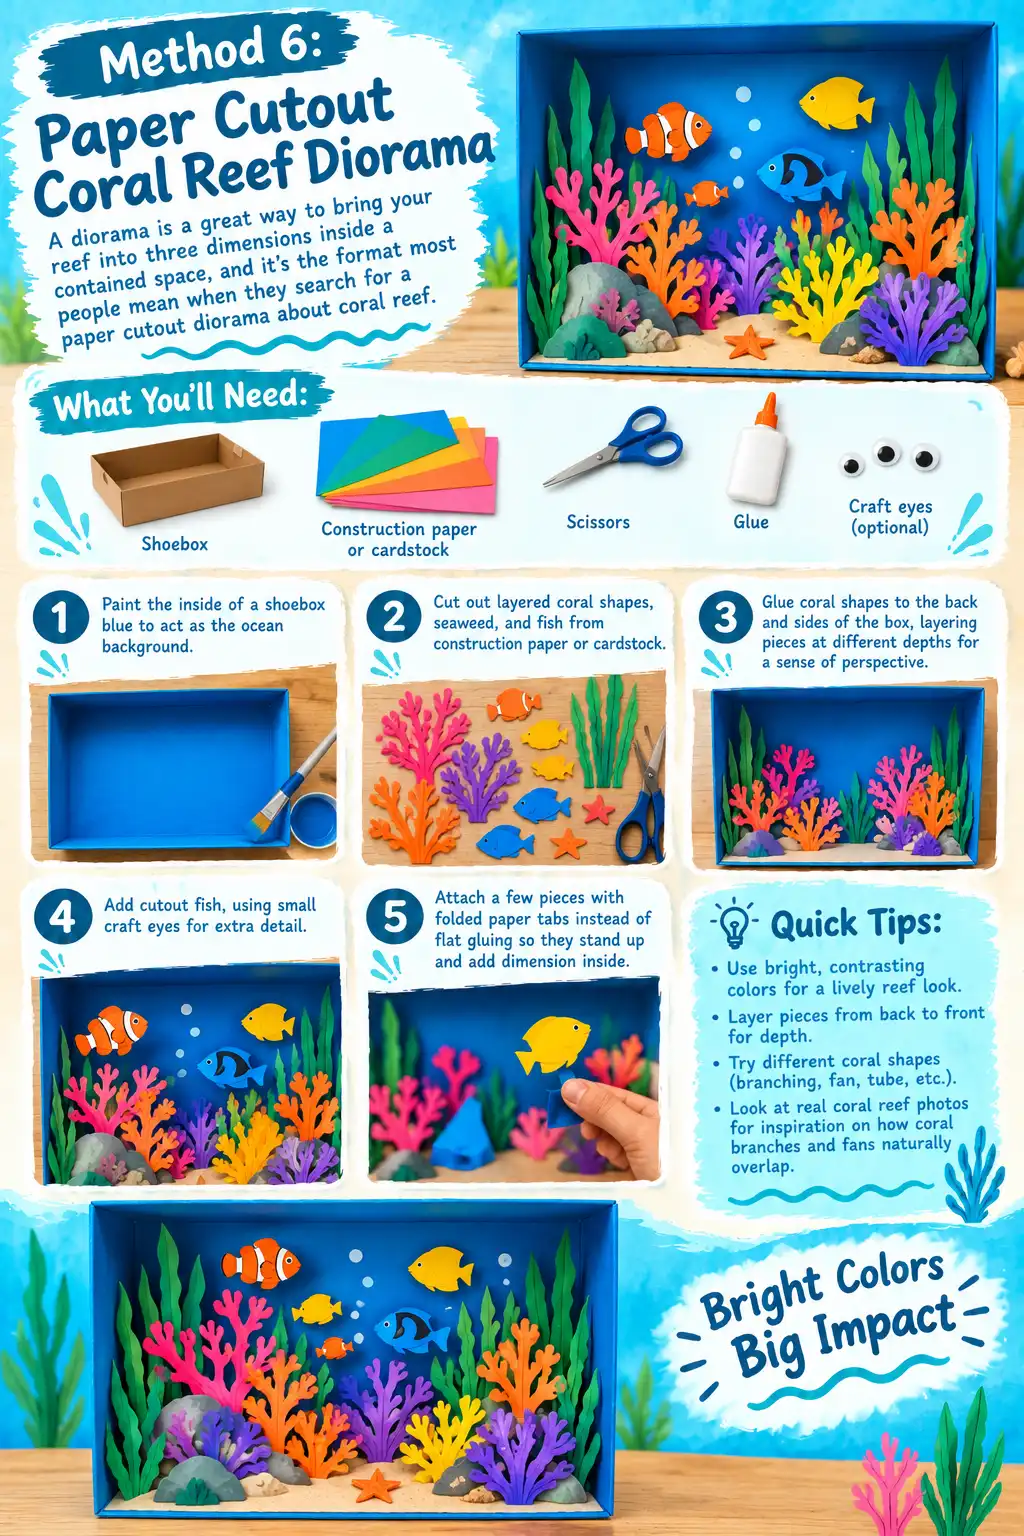
Method 6: Paper Cutout Coral Reef Diorama
A diorama is a great way to bring your reef into three dimensions inside a contained space, and it’s the format most people mean when they search for a paper cut out diorama about coral reef.
What you’ll need: a shoebox, construction paper or cardstock, scissors, glue, craft eyes (optional).
- Paint the inside of a shoebox blue to act as the ocean background.
- Cut out layered coral shapes, seaweed, and fish from construction paper or cardstock.
- Glue coral shapes to the back and sides of the box, layering pieces at different depths for a sense of perspective.
- Add cutout fish, using small craft eyes for extra detail.
- Attach a few pieces with folded paper tabs instead of flat gluing so they stand up and add dimension inside the box.
For extra realism, look at a few reference photos of what a real coral reef looks like before cutting, paying attention to how coral branches and fans naturally overlap. Our guide on beautiful sea creatures is a good source of color and shape inspiration for the fish you add to the scene.
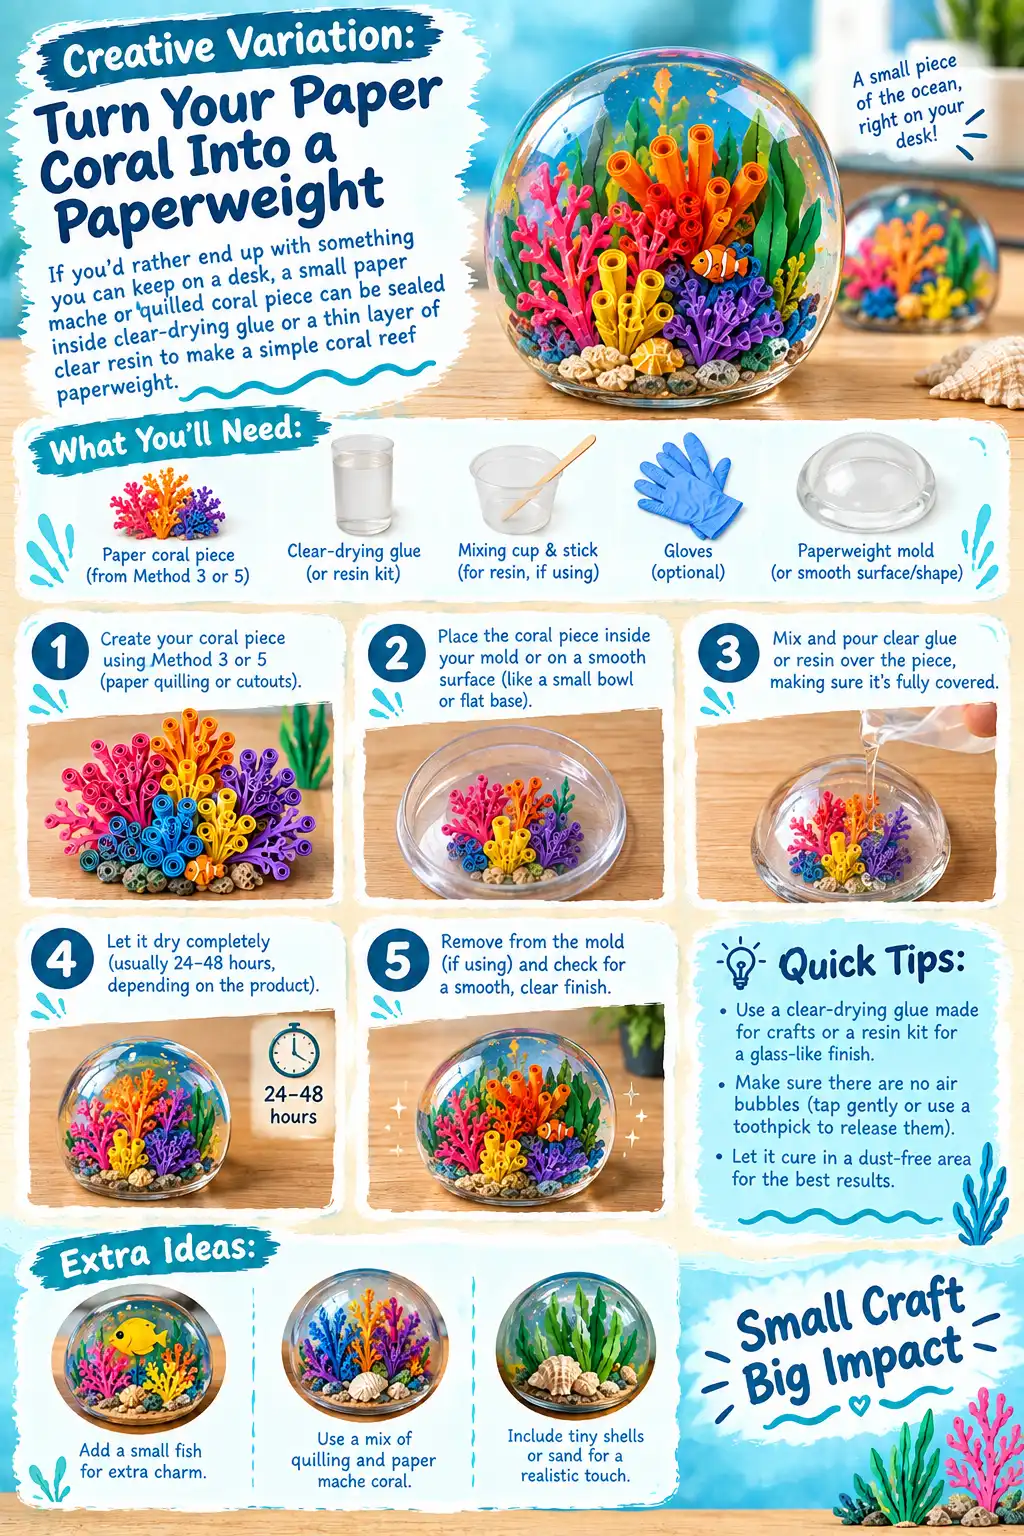
Creative Variation: Turn Your Paper Coral Into a Paperweight
If you’d rather end up with something you can keep on a desk, a small paper mache or quilled coral piece can be sealed inside clear-drying glue or a thin layer of clear resin kit to make a simple coral reef paperweight. This isn’t a full method on its own, more a fun finishing option once you’ve already shaped a small coral piece using Method 3 or Method 5 above.
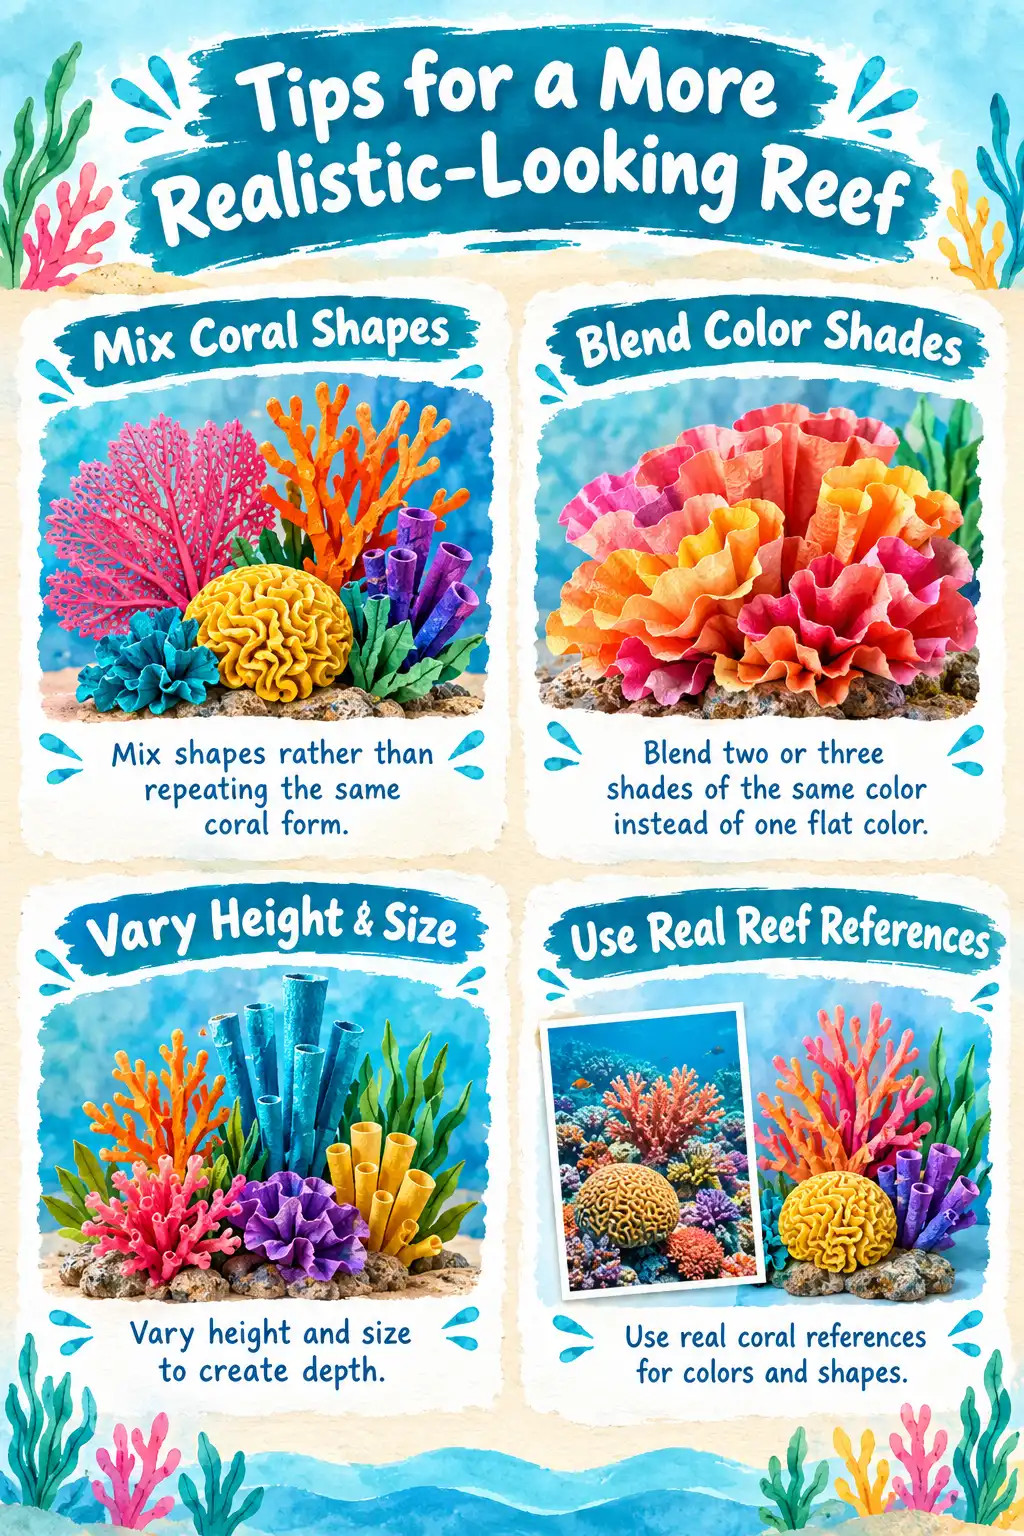
Tips for a More Realistic-Looking Reef
- Mix shapes rather than repeating the same coral form across the whole piece: real reefs combine fans, branches, and rounded brain coral in the same space.
- Blend two or three shades of the same color instead of using one flat color per piece, since real coral rarely has a single uniform tone.
- Vary the height and size of each piece so the reef has depth instead of looking flat against the background.
- Check our coral reef facts page for reference on real coral colors and shapes before you start cutting.
- For photos of real coral formations and species, NOAA’s Coral Reef Conservation Program is a solid reference for shapes and colors to base your paper version on.
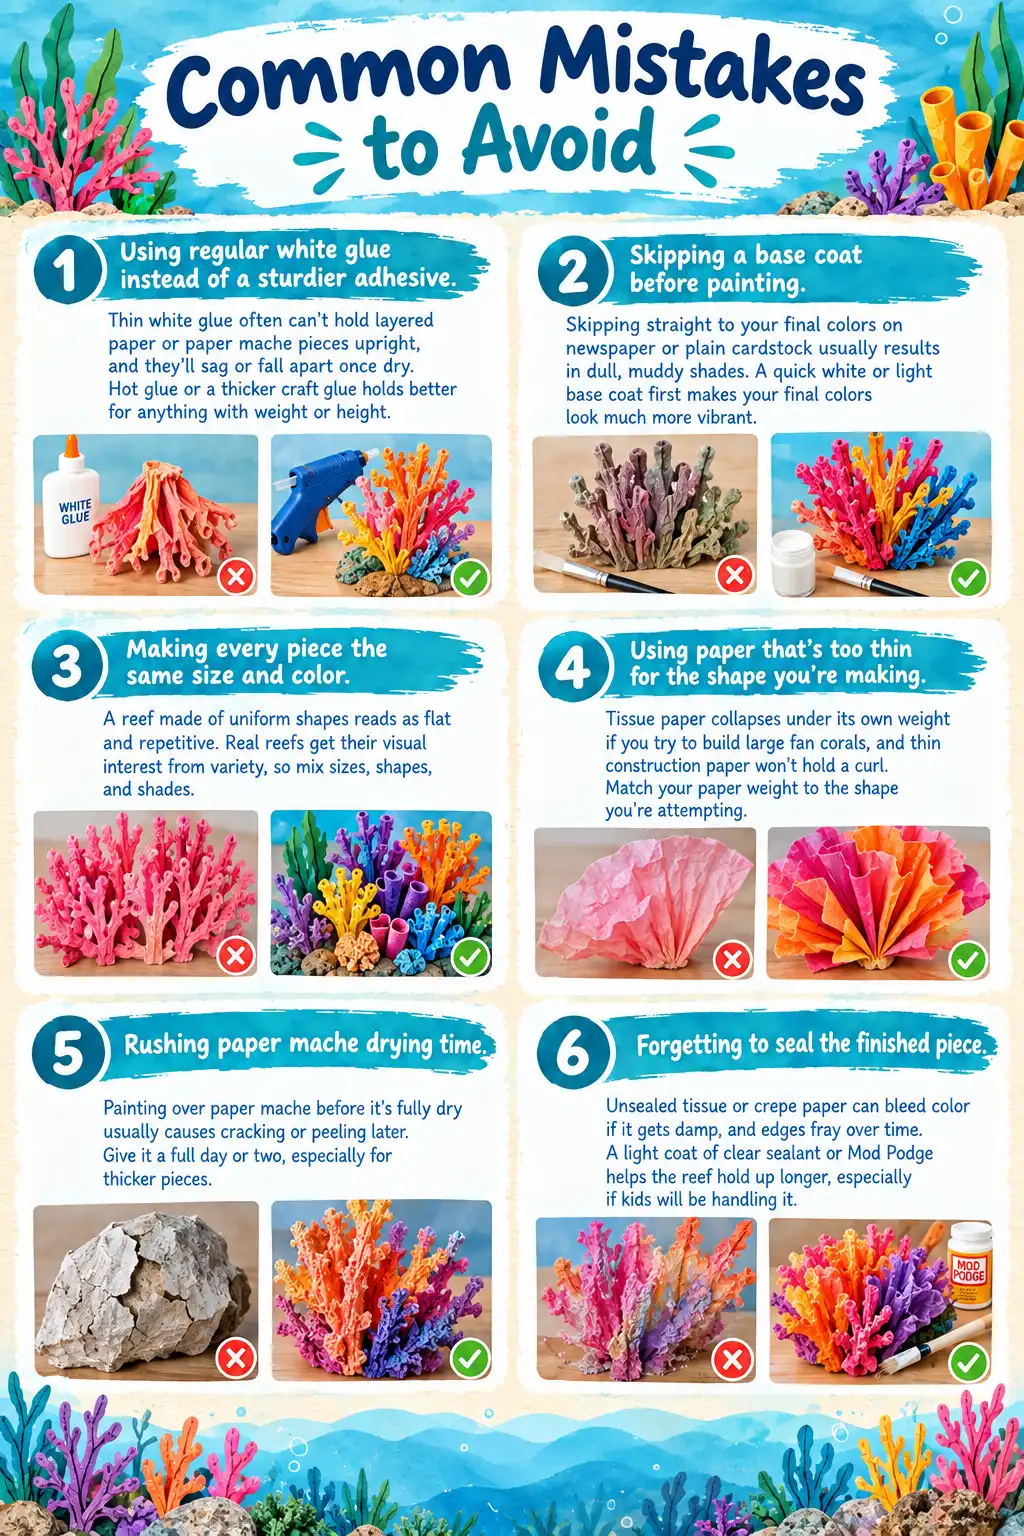
Common Mistakes to Avoid
- Using regular white glue instead of a sturdier adhesive. Thin white glue often can’t hold layered paper or paper mache pieces upright, and they’ll sag or fall apart once dry. Hot glue or a thicker craft glue holds better for anything with weight or height.
- Skipping a base coat before painting. Skipping straight to your final colors on newspaper or plain cardstock usually results in dull, muddy shades. A quick white or light base coat first makes your final colors look much more vibrant.
- Making every piece the same size and color. A reef made of uniform shapes reads as flat and repetitive. Real reefs get their visual interest from variety, so mix sizes, shapes, and shades.
- Using paper that’s too thin for the shape you’re making. Tissue paper collapses under its own weight if you try to build large fan corals, and thin construction paper won’t hold a curl. Match your paper weight to the shape you’re attempting.
- Rushing paper mache drying time. Painting over paper mache before it’s fully dry usually causes cracking or peeling later. Give it a full day or two, especially for thicker pieces.
- Forgetting to seal the finished piece. Unsealed tissue or crepe paper can bleed color if it gets damp, and edges fray over time. A light coat of clear sealant or Mod Podge helps the reef hold up longer, especially if kids will be handling it.
FAQs
How do you make fake coral with paper? The simplest approach is fringing and rolling tissue or crepe paper into branch and fan shapes, then gluing them onto a backdrop. For a more solid, sculptural fake coral, paper mache over a wire frame holds up better and looks more three-dimensional once painted.
How do you make a DIY coral reef? Start by sketching a mix of coral shapes (fans, branches, and rounded forms), then build each shape using one of the paper methods above. Layer the finished pieces onto a background or inside a diorama, mixing colors and sizes so the reef doesn’t look repetitive.
What are some easy DIY paper crafts? Beyond coral reefs, paper plate crafts, construction paper cutouts, and simple tissue paper flowers are all fast, low-cost paper projects that use similar folding, cutting, and layering techniques.
If you’re building this alongside a shell display, take a look at our rarest seashells in the world guide for real reef-adjacent pieces that pair nicely with a paper coral scene. For more ocean-themed crafts and facts, browse the full coral reefs category.